Winter Sowing in Recycled Containers: How to Start Hardy Seeds Outdoors in the Cold

Why Winter Sowing Works
Winter sowing uses recycled containers as mini greenhouses, placed outdoors during the cold months. This method mimics nature's seed stratification, giving hardy seedlings a strong start without any indoor equipment.
It’s a patient, low-cost approach that respects the plant's natural cycle.
Essential Supplies for Cold-Weather Seed Starting
Recycled Containers
Clear plastic jugs, soda bottles, or takeout containers work perfectly. They must be translucent to let light in and have lids you can cut.
Wash them thoroughly and remove labels before cutting.
Soil and Seeds
Use a lightweight seed-starting mix, not garden soil. Choose cold-tolerant species like kale, lettuce, or perennials such as echinacea.
Hardy annuals like violas also respond well to this method. Avoid warm-season crops like tomatoes.
Tools and Labels
You'll need scissors, a knife, waterproof tape, and a permanent marker. Optionally, a heat mat speeds germination but isn't essential.
Labels are critical to remember what you planted in each container.
Step-by-Step Process
1. Prepare the Containers
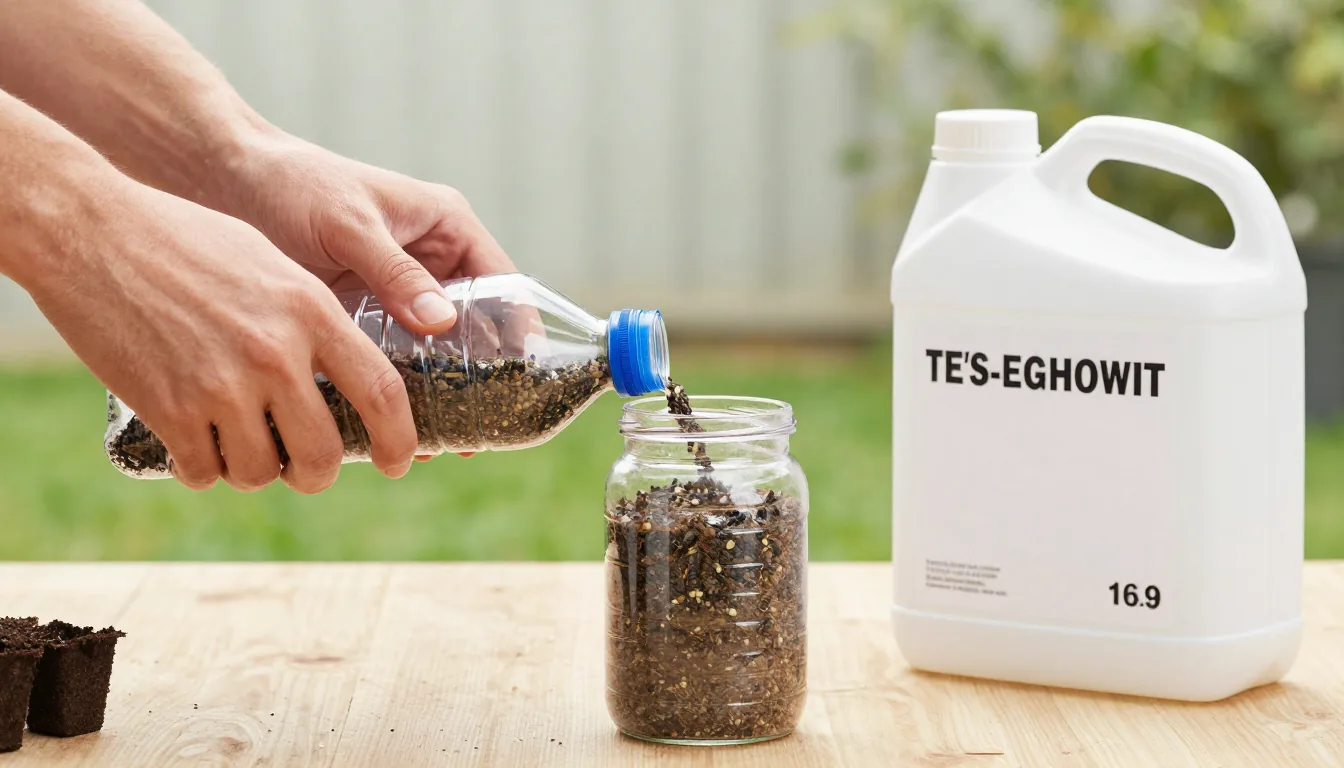
Cut the container horizontally about 4 inches from the bottom, leaving a hinge. Puncture drainage holes in the base and a few ventilation holes in the top.
Label each container with the seed type and date to track progress.
2. Fill with Soil
Moisten the seed-starting mix, then fill the bottom half of the container. Press lightly to remove air pockets.
Sow seeds according to package depth, usually 1/4 inch. Cover with a thin layer of mix and gently firm it.
3. Water and Seal
Water gently to settle the soil. Close the top and secure with tape along the cut line.
Leave the cap off or slightly open for air exchange. Place containers in a sunny, sheltered outdoor spot, such as against a south-facing wall.
4. Monitor and Wait
Check every week for moisture. In cold weather, condensation is normal and indicates a good environment.
When temperatures rise, open the cap fully. Seedlings emerge when conditions are right—no need to rush the process.
Hardening Off and Transplanting
Once seedlings have two sets of true leaves, begin hardening off by opening the container during the day. After a week of adjustment, transplant them into garden beds.
For more tips on transplanting, visit Gardening & Nature. Also, refer to the UNH Extension guide on winter sowing and Gardener’s Supply Company article for detailed crop charts.
Benefits of This Method
Winter sowing eliminates the need for indoor lights and heat mats, saving energy. It naturally selects the strongest seedlings because only the fittest survive cold snaps.
Plus, it reduces transplant shock since plants are already acclimated to outdoor conditions.
Common Mistakes to Avoid
Starting Too Early
Hold off until after the winter solstice. Seeds need natural light cycles; early sowing may cause leggy growth that weakens seedlings.
Using Wrong Containers
Dark containers absorb too much heat and can cook the seeds. Always use clear or translucent plastic to allow light penetration and temperature regulation.
Neglecting Ventilation
Without ventilation, excess humidity can lead to mold. Leave the cap slightly open or poke extra holes in the top to maintain airflow.
FAQs
Can I start seeds too early?
Yes, hold off until after the winter solstice. Seeds need natural light cycles.
Early sowing may cause leggy growth.
Do I need to fertilize?
Not until transplanting. The seed mix has enough nutrients for the first few weeks.
After transplant, use diluted organic fertilizer to support growth.
Expanded Tips for Success
To improve germination rates, pre-soak hard seeds like morning glory overnight. Place containers in a spot with good snow cover for insulation.
Snow melt provides consistent moisture without overwatering, which encourages strong root development. Also, group containers together for added warmth.
This shared microclimate can speed up germination by several days. Remember to rotate containers weekly to prevent leaning toward the sun.
Another useful technique is to add a thin layer of vermiculite on top of the soil. This helps retain moisture and prevents damping-off disease.
If you notice mold, increase ventilation immediately.
A gentle fan nearby can improve air circulation without drying out the containers. With these extra steps, your winter sowing success rate will increase significantly.