
Are you tackling a room refresh? Knowing common DIY painting mistakes can save you time and frustration.
Whether you’re dealing with drips, uneven coverage, or tape bleed, these easy fixes will help you achieve a smooth, professional finish. With a little patience and the right techniques, you can transform any wall like a pro.
DIY Painting Mistakes: Drips and Runs
Drips and runs occur when you overload your roller or brush with paint. This classic DIY painting mistake creates unsightly streaks down the wall.
To fix them, let the paint dry completely, then sand the area smooth with fine-grit sandpaper. Apply a second thin coat for a flawless result.
Prevention is key: load your roller evenly and avoid overworking the paint. Use high-quality brushes that hold just the right amount.
Always work from top to bottom to catch drips early. This method helps you avoid one of the most common painting pitfalls beginners face.
For stubborn drips, use a damp sponge to gently blend the paint. This can help minimize the appearance without sanding.
Uneven Coats and How to Avoid Them
Uneven coats often stem from poor roller technique or low-quality paint. This DIY painting mistake leaves patches of lighter and darker color after drying.
To fix, lightly sand the area and apply a primer before repainting. Use a roller with the correct nap for your wall texture—shorter nap for smooth walls, longer for textured.
Stir your paint thoroughly and maintain a wet edge to avoid lap marks. Work in small sections, overlapping each pass slightly.
Proper technique eliminates many common painting errors related to finish. A high-quality primer can also help achieve uniform coverage.
It seals the surface and enhances paint adhesion, preventing further issues.
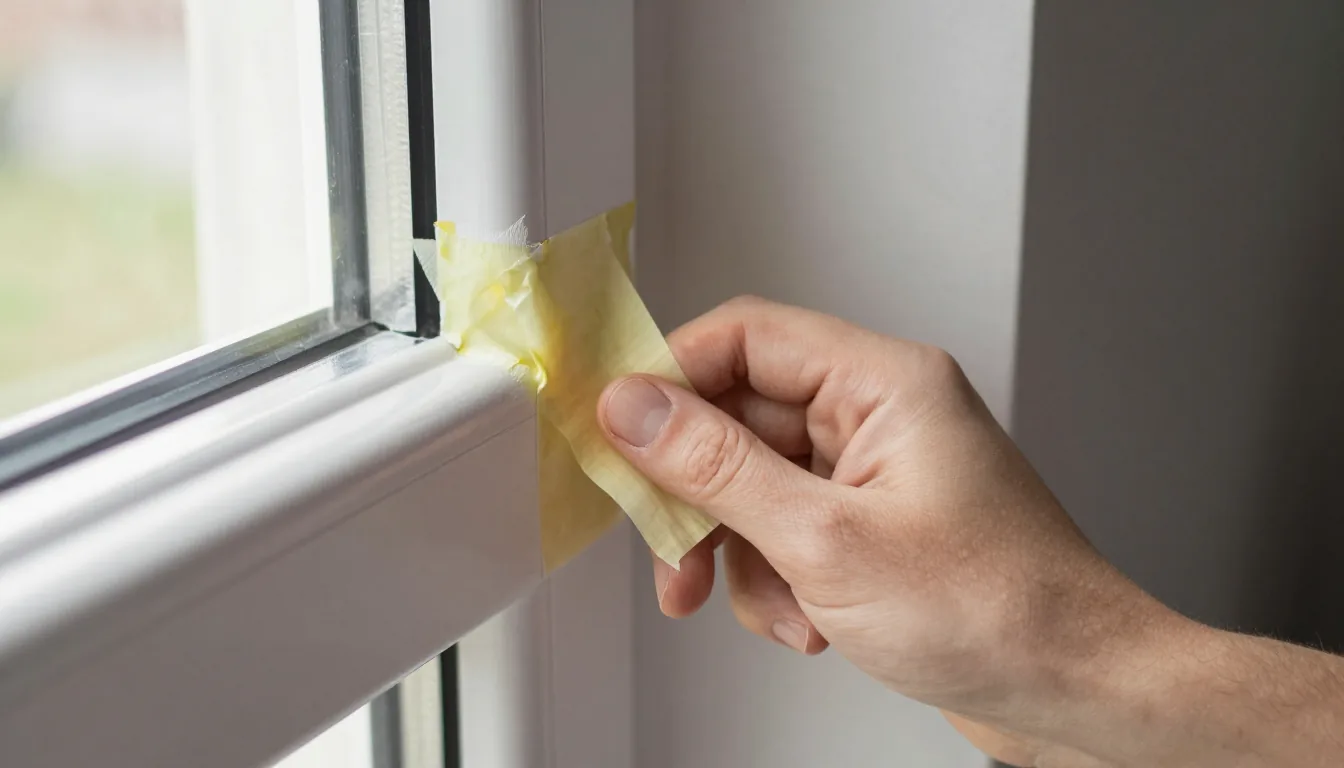
Painter’s Tape Bleed
Bleeding under painter’s tape is one of the most frustrating DIY painting mistakes. It happens when the tape isn’t sealed properly or is removed too late.
To fix, create crisp lines by first painting a thin layer of the base color along the tape edge. This seals it, then apply your accent color.
Remove the tape while the paint is still wet for the sharpest edges. Always use high-quality painter’s tape and press it firmly onto the surface.
Avoid leaving tape on for more than 24 hours to prevent adhesive residue. For extra protection, run a hairdryer along the tape edge to soften the adhesive before removal.
This simple fix saves you from redoing edges.
Brush Marks and Texture Issues
Brush marks appear when paint is too thick or you apply too much pressure. This DIY painting mistake results in a bumpy, unprofessional finish.
To fix, sand lightly between coats and use a paint conditioner like Floetrol for smoother application. Switch to a roller for large areas to avoid streaks.
Choose a brush with synthetic bristles for water-based paints. Work in long, even strokes and maintain a consistent angle.
Clean your brush thoroughly between coats for best results. Using a paint extender can slow drying time, allowing brush marks to level out.
Avoiding brush marks is crucial for a flawless look.
Wrong Paint Type or Sheen
Using the wrong sheen can ruin your project—flat paint on trim wears quickly, while high-gloss on walls highlights imperfections. This DIY painting mistake is easy to avoid with a little planning.
To fix, sand and repaint with the appropriate sheen: eggshell or satin for walls, semi-gloss for trim and doors. Always test a small area first to see how light reflects.
By avoiding these common errors, your painting project will look professionally done. Remember to prepare your surface, use quality materials, and take your time.
For more home improvement advice, explore our Home Decor & DIY section. You can also consult trusted sources like Sherwin-Williams or DIY Network for additional painting tips. Happy painting!
Learning these DIY painting mistakes will help you achieve a professional finish on every project.

