
The home brewing process transforms simple grains into complex, flavorful beer. Whether you are a novice or an experienced brewer, understanding each step is crucial for crafting quality artisan beer.
This guide walks you through the essential stages from malting to bottling.
Sanitation is paramount in home brewing. Any contamination can ruin a batch.
Clean all equipment thoroughly before use.
Understanding the Home Brewing Process
Mastering the home brewing process requires attention to detail at every stage. From selecting ingredients to conditioning the final product, each step builds on the last.
The result is a beer that reflects your personal taste and skill.
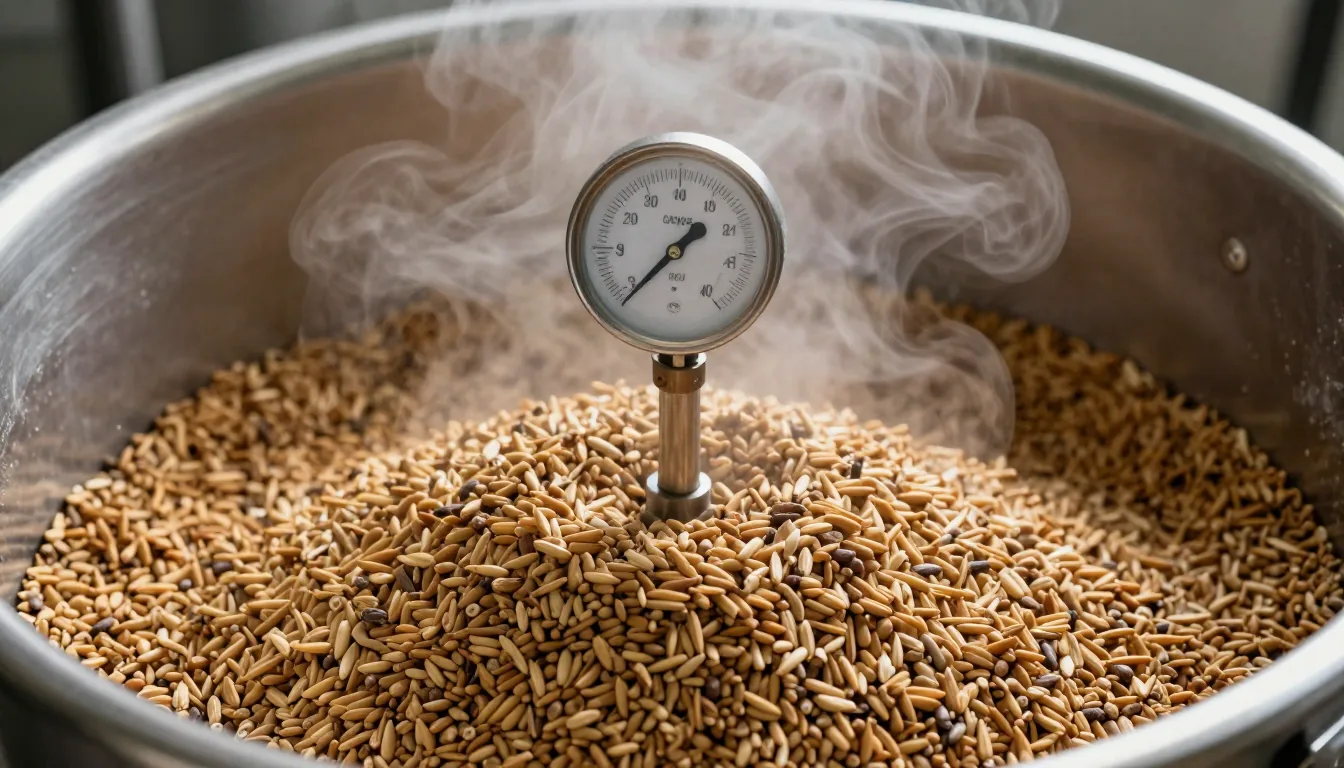
Brewing starts with raw barley, which must be malted to unlock its fermentable potential. This foundational step sets the stage for all the flavors to come.
Malting Fundamentals
Malting involves soaking barley in water to initiate germination, then drying it in a kiln. This process activates enzymes that convert starches into sugars later.
Home brewers often purchase pre-malted grain, but understanding malting deepens your craft.
The kilning temperature determines the beer’s color and flavor—from pale malts for lagers to dark roasted malts for stouts. Experimenting with different malts can create unique profiles.
Home brewers often buy pre-malted grain to save time. However, malting your own grain gives you control over flavor.
The roasting level influences the final color and taste.
Mashing: The Sugar Extraction
Mashing is where crushed malt meets hot water in a mash tun. The mixture rests at a specific temperature, typically around 150°F (65°C), to allow enzyme activity.
This converts starches into fermentable sugars like maltose.
Temperature control is critical in the home brewing process during mashing. A lower mash temperature (148°F) produces a thinner, drier beer, while a higher temperature (158°F) yields more body and residual sweetness.
Accurate strikes and rests are key.
After mashing, the liquid (wort) is separated from the grain husks through sparging. Rinse the grains with hot water to extract maximum sugars.
Boiling and Hopping Strategies
The wort is brought to a vigorous boil, usually for 60 minutes. During this time, hops are added at different intervals: early additions contribute bitterness, middle additions add flavor, and late additions provide aroma.
The boil also sterilizes the wort.
Different hop varieties offer distinct characteristics. For example, Cascade hops give citrus notes, while Saaz hops provide earthy spice.
Experiment with combinations to create your signature brew.
Hop additions are often timed at 60, 30, 15, and 0 minutes remaining in the boil. The 60-minute addition provides bitterness, while later additions contribute aroma.
Experiment with timing to create complexity.
Fermentation Control
After boiling, the wort is rapidly cooled and transferred to a sanitized fermenter. Yeast is pitched, and fermentation begins.
Ale yeasts work best at 60–72°F, producing fruity esters, while lager yeasts ferment at 45–55°F for a clean profile. The home brewing process demands careful temperature management to avoid off-flavors.
Primary fermentation lasts one to two weeks. Use a hydrometer to monitor specific gravity; two stable readings confirm completion.
A vigorous airlock activity indicates healthy fermentation.
Use a programmable thermostat and heating belt to maintain stable temperatures. Temperature fluctuations can stress yeast.
Consistent conditions yield better beer.
Yeast Selection and Management
Choosing the right yeast strain greatly impacts the final beer. Different strains produce varying esters, phenols, and attenuation levels.
Liquid yeast offers more variety, while dry yeast is convenient and stable.
Proper oxygenation of the wort before pitching yeast ensures a healthy fermentation. Use aeration stones or shake the fermenter to dissolve oxygen.
Yeast nutrients can be added to ensure healthy fermentation. Some brewers also use starters to increase cell count.
Proper pitch rates are essential for clean beer.
Carbonation and Conditioning
Once fermentation is complete, the beer is primed with sugar (usually corn sugar or dextrose) and bottled. The remaining yeast consumes the sugar, producing natural carbonation.
Bottle conditioning also allows flavors to mature and meld.
Conditioning typically takes two to four weeks at room temperature. After that, chill the bottles for several days before opening.
The carbonation level depends on the amount of priming sugar used—adjust to style.
Patience is key during conditioning. Rushing the process can lead to off-flavors.
Aging improves complexity.
For further reading on the home brewing process, check out Homebrewers Association and Brew Your Own Magazine.
This home brewing process is a rewarding journey that connects you to the ancient art of beer making. Each batch is a chance to refine your technique and share with friends. Explore more about Gastronomy & Food.

