
Why Choose Reclaimed Materials for Your Raised Bed
Building a reclaimed raised bed is one of the most satisfying projects you can undertake in your garden. A reclaimed raised bed reduces your carbon footprint while creating a unique focal point in the garden. Not only does it keep waste out of landfills, but it also adds character and warmth to your growing space.
Salvaged wood, bricks, or metal can be transformed into sturdy, productive beds that cost pennies compared to new kits. This approach aligns perfectly with permaculture ethics—caring for the earth while meeting your own needs.
Old shipping pallets, discarded roof tiles, or even deconstructed barns can find a second life as a vegetable garden.
Plus, the weathered patina of reclaimed timber often resists rot better than new, untreated lumber. The key to a durable reclaimed raised bed is choosing weather-resistant lumber.
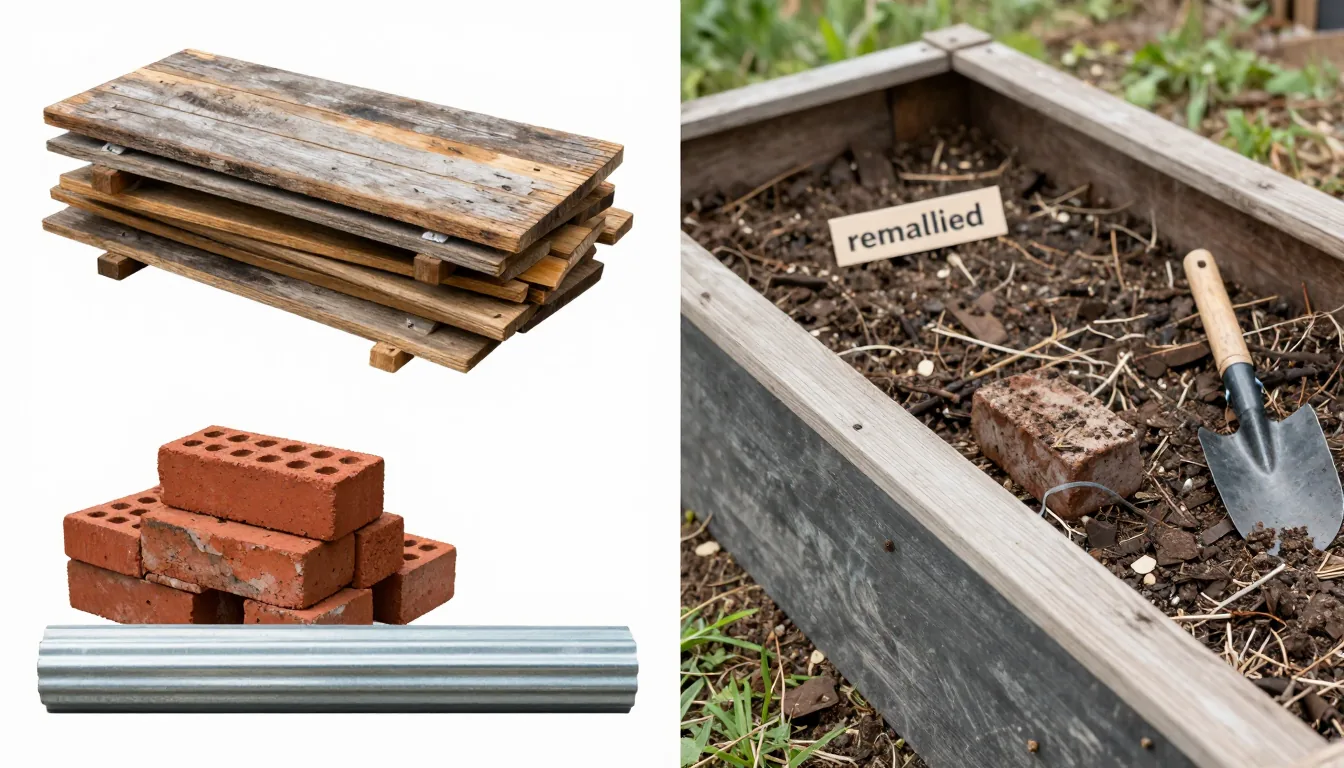
Sourcing and Selecting Salvaged Materials
Start by scouring local construction sites, demolition yards, or online marketplaces for free or cheap materials. Look for untreated hardwood like oak, chestnut, or cedar—these are naturally rot-resistant and safe for edible gardens.
The key to a durable reclaimed raised bed is choosing weather-resistant lumber.
Bricks and concrete blocks are excellent alternatives if wood is scarce. Metal roofing sheets or corrugated iron can be bent into curved beds, but ensure they're free of rust and lead paint.
Always inspect materials for nails, splinters, or sharp edges before handling.
Preparing Your Site and Measuring
Choose a level spot with at least six hours of direct sunlight. Mark the outline of your bed using string and stakes.
A width of 3–4 feet (90–120 cm) allows you to reach the center without stepping on the soil. Length can vary, but 6–8 feet (180–240 cm) is manageable.
Remove grass or weeds from the area—sheet mulching with cardboard is an easy no-dig method. If using bricks, dig a shallow trench for stability.
For wood beds, consider adding a layer of landscape fabric beneath to prevent weeds from creeping up.
Step-by-Step Assembly of Your Reclaimed Raised Bed
First, cut your salvaged wood to length—use a circular saw or handsaw. If using pallets, disassemble them carefully with a crowbar and remove any nails.
Sand rough edges to avoid splinters.
For a simple rectangular bed, screw the side panels together at the corners using galvanized screws. A reclaimed raised bed doesn’t have to be square—experiment with L-shapes or curves to fit your space.
If you're working with bricks, stack them in a running bond pattern (staggered joints) and fill gaps with soil or mortar for permanence. Metal sheets can be curved by bending them over a wooden frame—wear gloves to avoid cuts.
Whichever material you choose, ensure the walls are at least 8–12 inches (20–30 cm) high to allow deep root growth.
Filling and Planting Your New Bed
Line the bottom with cardboard or hardware cloth if rodents are a problem. Then fill with a mix of topsoil, compost, and well-rotted manure—about 60% topsoil, 30% compost, and 10% sand for drainage.
Water the bed thoroughly and let it settle for a few days before planting.
You can sow seeds or transplant seedlings directly. In a reclaimed raised bed, the soil warms earlier, so you can start planting weeks ahead of the ground.
Consider companion planting to deter pests—marigolds with tomatoes, basil with peppers.
As the season progresses, top-dress with compost to feed the soil. For more tips on sustainable gardening, explore our Gardening & Nature category. Building a reclaimed raised bed is a rewarding weekend project that yields fresh produce for years.
Reclaimed beds also warm up faster in spring than in-ground plots, giving you a head start on the season. For deeper soil health insights, visit the Rodale’s recipe and Permaculture Magazine for more inspiration.

