
Season Extension Cold Frames: What You Need to Know
Every gardener knows the frustration of a late frost or early cold snap cutting the harvest short. Season extension cold frames offer a simple, low-cost solution. These mini greenhouses trap solar heat and protect plants from wind and frost.
With a cold frame, you can start seeds weeks earlier in spring and keep crops producing well into autumn. Many growers even overwinter cold-hardy greens like kale and spinach.
A well-positioned cold frame can raise soil temperature by 5–10°F compared to open ground.
Choosing the Right Location
Site your cold frame where it gets maximum winter sun. A south-facing slope or wall is ideal.
Avoid low spots where cold air pools.
If possible, tilt the frame slightly south to capture more light. Good drainage is also critical — waterlogged soil freezes faster.
Materials and Design Options
You can build a cold frame from reclaimed wood, bricks, or even straw bales. The lid should be transparent — glass or polycarbonate are best.
Polycarbonate is lighter and safer than glass.
For ventilation, add a prop stick or automatic vent opener. Without airflow on warm days, seedlings can cook inside.
For a budget-friendly season extension cold frame, polycarbonate is ideal because it diffuses light and insulates well.
Building a Simple Cold Frame in a Weekend
Start with a wooden box about 2×4 feet. The back wall should be taller than the front to create a sloping lid.
This angle sheds rain and catches more sun.
Line the inside with rigid foam insulation for extra warmth. Attach hinges to the lid and seal edges with weatherstripping.
No need for power tools — a basic frame can be assembled with screws.
Step-by-Step Construction
- Cut lumber: two long sides (back taller, front shorter) and two short sides cut to match the slope.
- Assemble the box with screws or nails. Use galvanized hardware to resist rust.
- Attach the transparent lid using gate hinges or piano hinges. Leave a gap for venting.
- Add a latch to keep the lid closed during storms.
A well-built structure will last many seasons and provide reliable season extension for your garden.
Using Your Cold Frame for Spring and Fall Crops
In early spring, start cold-hardy seeds like lettuce, radishes, and peas directly in the frame. The soil inside will warm up 2–4 weeks earlier than open ground.
For fall extension, plant fast-growing crops in late summer. A cold frame can protect them until hard frosts.
Check soil moisture regularly — the frame reduces rainfall reaching the soil. Many gardeners use season extension cold frames to get a head start on warm-season crops like tomatoes and peppers, but careful hardening off is needed before transplanting outdoors.
Best Crops for Cold Frames
Cold frames are perfect for leafy greens such as kale, spinach, and arugula. Root crops like carrots and beets also do well.
For beginners, these crops are most forgiving under season extension cold frames.
You can even grow cold-hardy herbs like parsley and cilantro. The key is to provide adequate ventilation on warm days to prevent mildew.
With proper care, your cold frame can produce fresh greens well into December.
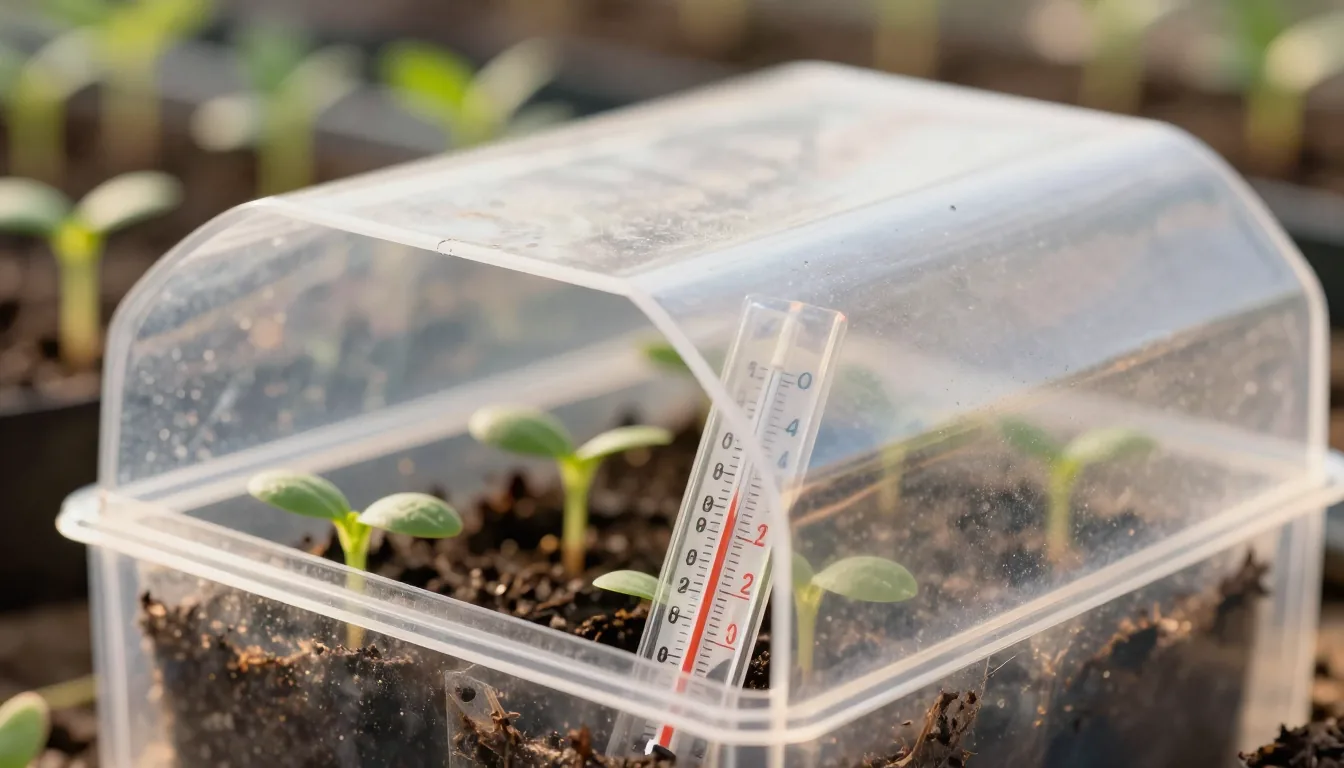
Managing Temperature and Ventilation
On sunny days, open the lid a crack when the temperature inside exceeds 75°F (24°C). Close it in late afternoon to trap heat.
On freezing nights, cover the frame with an old blanket or row cover for extra insulation.
Use a simple thermometer to monitor temps. Avoid sudden temperature swings by venting gradually.
With proper management, your season extension cold frames can keep crops alive well into winter in many climates.
Common Mistakes and How to Avoid Them
One frequent error is making the frame too small. A 2×3 foot frame is the minimum for a family.
Also, don't neglect ventilation — overheating kills plants faster than cold.
Another mistake is using the wrong glazing. Glass is heavy and breaks easily.
Polycarbonate or even thick clear plastic film works well.
Another pitfall is forgetting to open the lid on sunny days. Without ventilation, temperatures can soar above 100°F, damaging tender plants.
Using an automatic vent opener can solve this. Season extension cold frames require daily attention during transitional weather.
For more on extending your growing season, check out other articles in our Gardening & Nature section. Also, see University of Minnesota Extension and The Old Farmer’s Almanac for additional tips.
Final Thoughts on Season Extension
Cold frames are a rewardingly simple tool. With just a few boards and a salvaged window, you can gain weeks of productivity in your garden.
Start small, observe carefully, and adjust as you go.
Whether you are a beginner or experienced, season extension cold frames offer a low-cost way to extend your harvest. Start with a simple design and expand as you learn.
Your soil will thank you, and your table will be fuller. Happy growing!

